HOW TO DEFINE YOUR
FLAG HALYARD LENGTH
* At the (aft) lower diagonal schroud,
set the positioning hitch to center your
halyard (without flag) between the
mast and the cap shroud (see picture).
This way you prevent the flag from hitting
the shroud or mast and wearing it out,
plus making an annoying sound
when you are below.
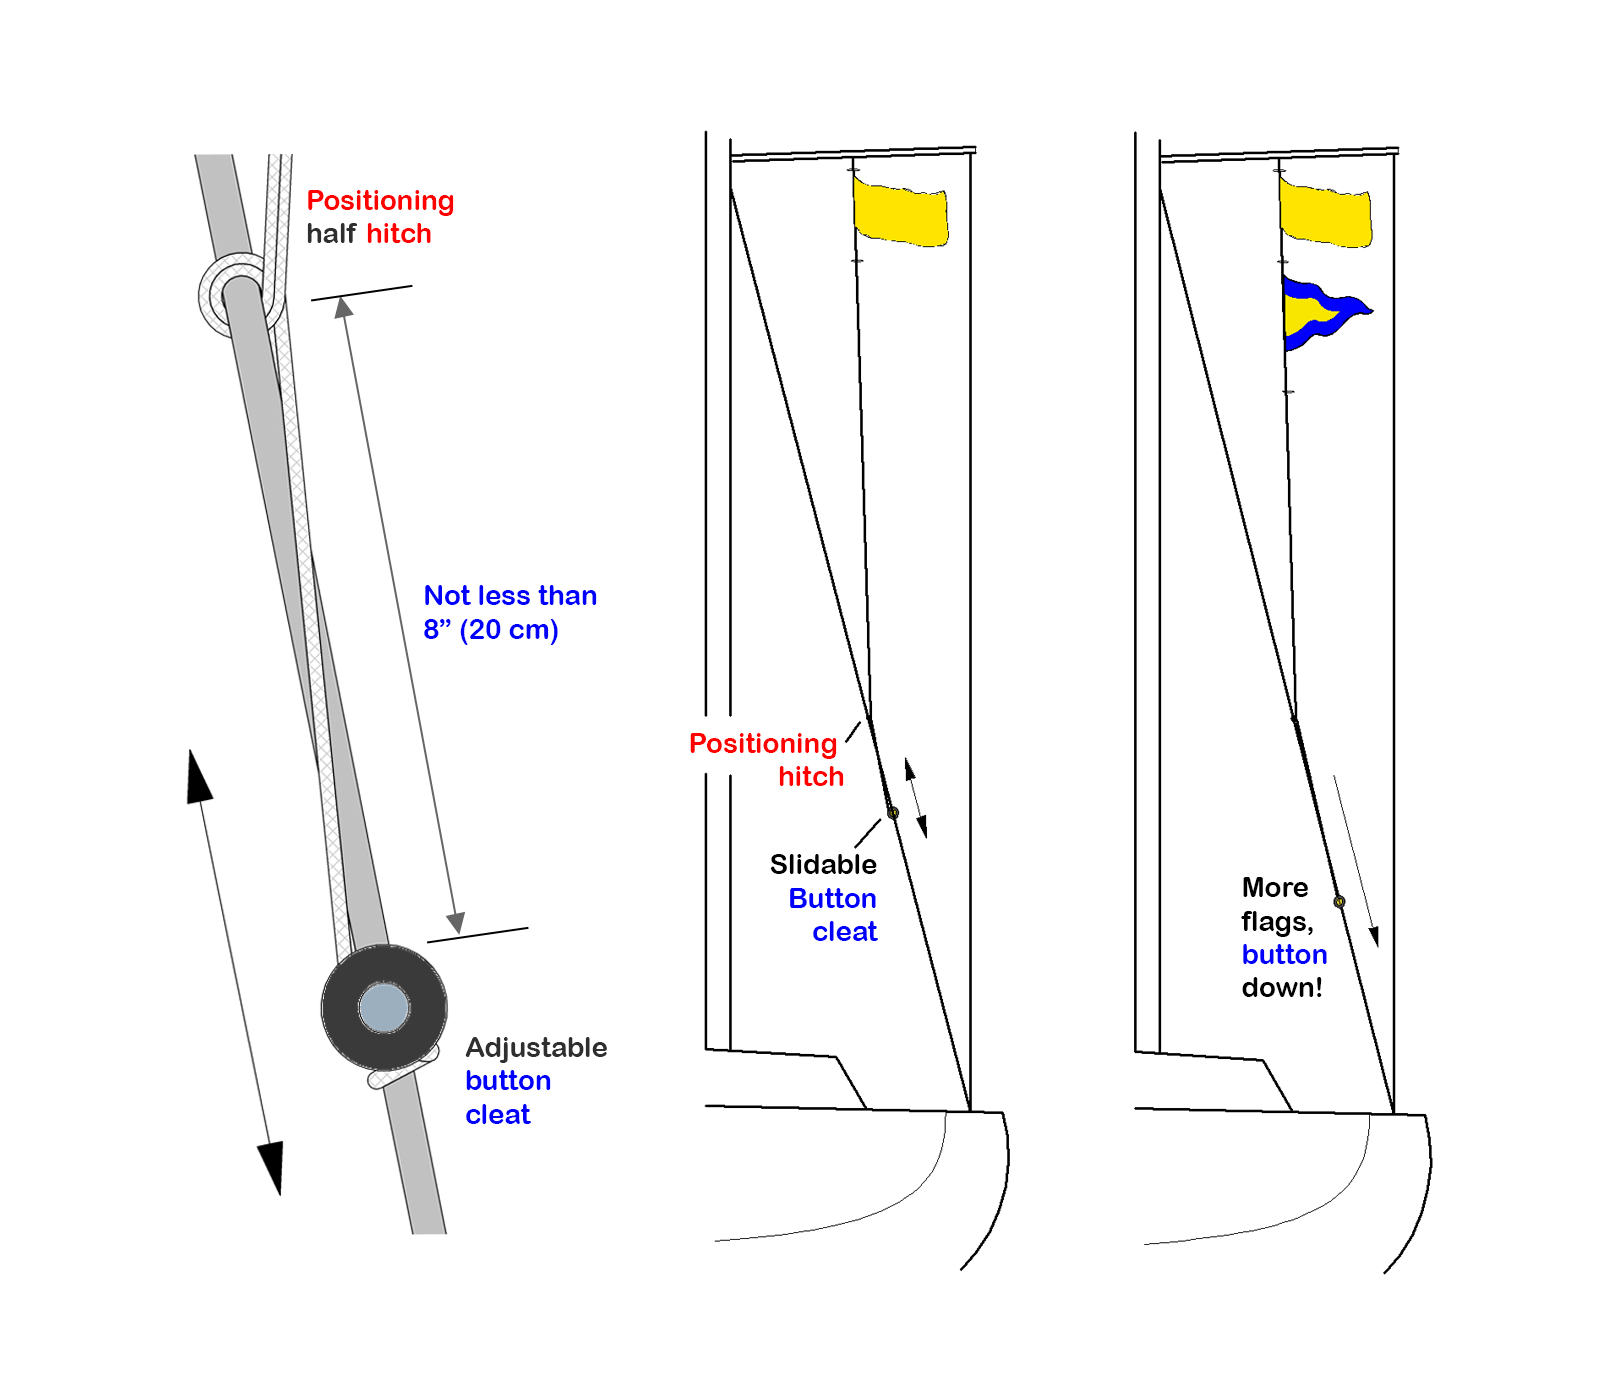
* Set the Button cleat not less than
20 cm. below the hitch.
* Finally adjust your halyard length to
make it fit around the Button Shroud Cleat
as shown on the picture below.
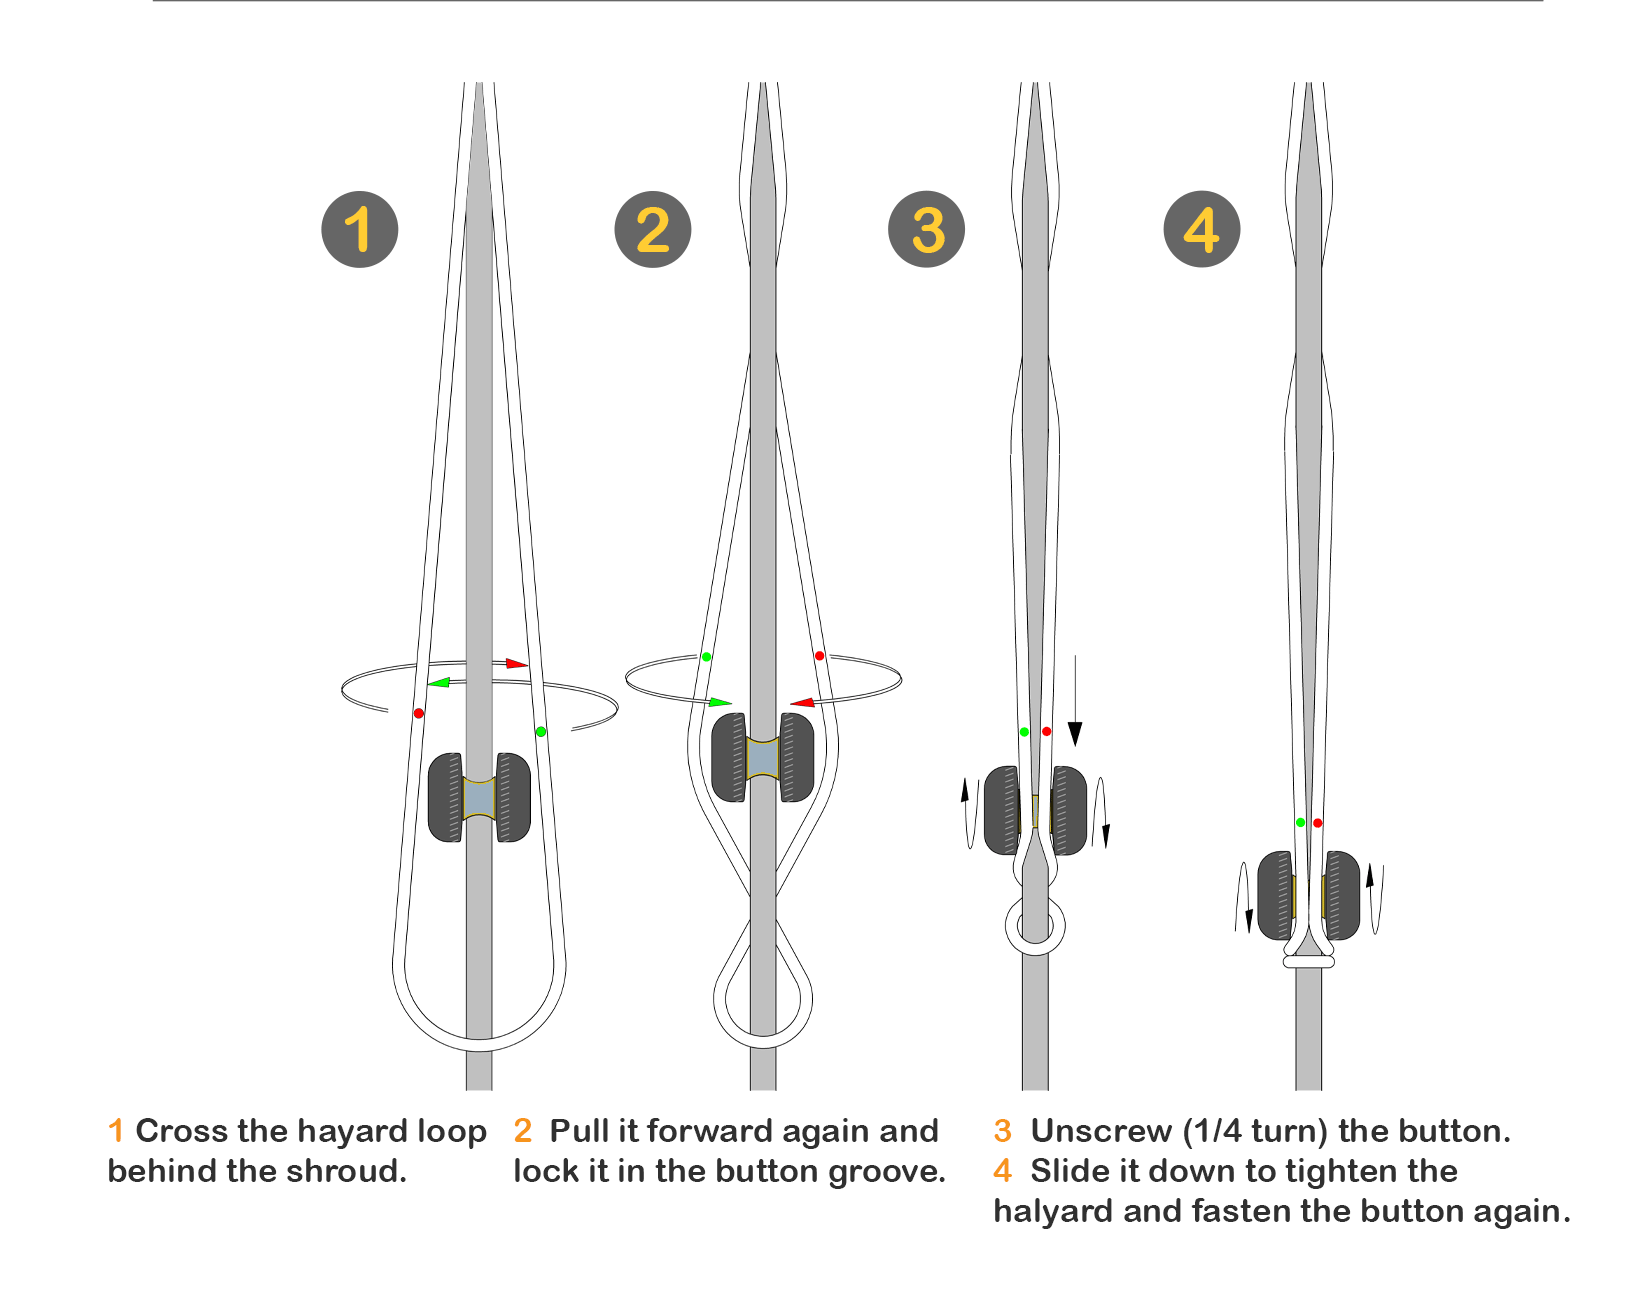
Securing and tightening
the flag halyard
|
|
|
| 1
Croiser la boucle de drisse derrière le hauban. 2 Tirez-le à nouveau vers l'avant et verrouillez-le dans la rainure du bouton. 3 Dévisser (1/4 de tour) le bouton 4 Faites-le glisser vers le bas pour serrer la drisse et revissez le bouton. |
|
|
|
|
| 1
Kreuzen Sie die Fallschlaufe hinter der Want. 2 Ziehen Sie ihn wieder nach vorne und verriegeln Sie ihn in der Knopfnut. 3 Schrauben Sie den Knopf ab (1/4 Umdrehung). 4 Schieben Sie es nach unten, um das Fall zu spannen, und ziehen Sie den Knopf wieder fest. |
|
|
|
|
| 1
Attraversare l'anello della drizza dietro la sartia 2 Tirarlo di nuovo in avanti e bloccarlo nella scanalatura del pulsante 3 Svitare (1/4 di giro) il bottone. 4 Farlo scorrere verso il basso per stringere la drizza e riagganciare il bottone. |
|
|
|
|
| 1
Cruce el lazo de driza detrás del obenque. 2 Tire hacia adelante de nuevo y bloquéelo en la ranura del botón. 3 Desenrosque (1/4 de vuelta) el botón. 4 Deslícelo hacia abajo para tensar la driza y vuelva a apretar el botón. |
|
|
|
|
| 1
Kruis de vallus achter de stag langs. 2 Trek de gekruiste lus weer naar voren en vergrendel hem in de knop-kikker groef. 3 Draai de knop-kikker (1/4 slag) los. 4 Schuif deze naar beneden om de val te spannen en zet de knop weer vast. |
button shroud cleat adapts easily
to the varying length of your halyard.
* Tips:
Practice assembling of the button cleat at a table.
Place a towel on deck while mounting it to the shroud.
This way you reduce the risk that if something
accidentally falls, it will bounce on deck
and fall overboard.
Take your time, you only have to do it once.
Use braided polyester halyard rope.
Preferably 3 mm (1/8”) .
Maintenance: Rinse with fresh water.

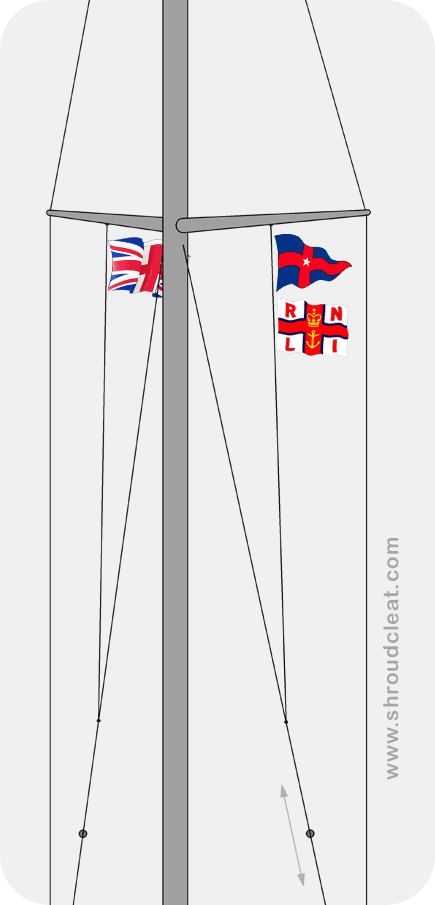
other spreader flags

with grommets.


Small and Sleek
compared to conventional shroud cleats.
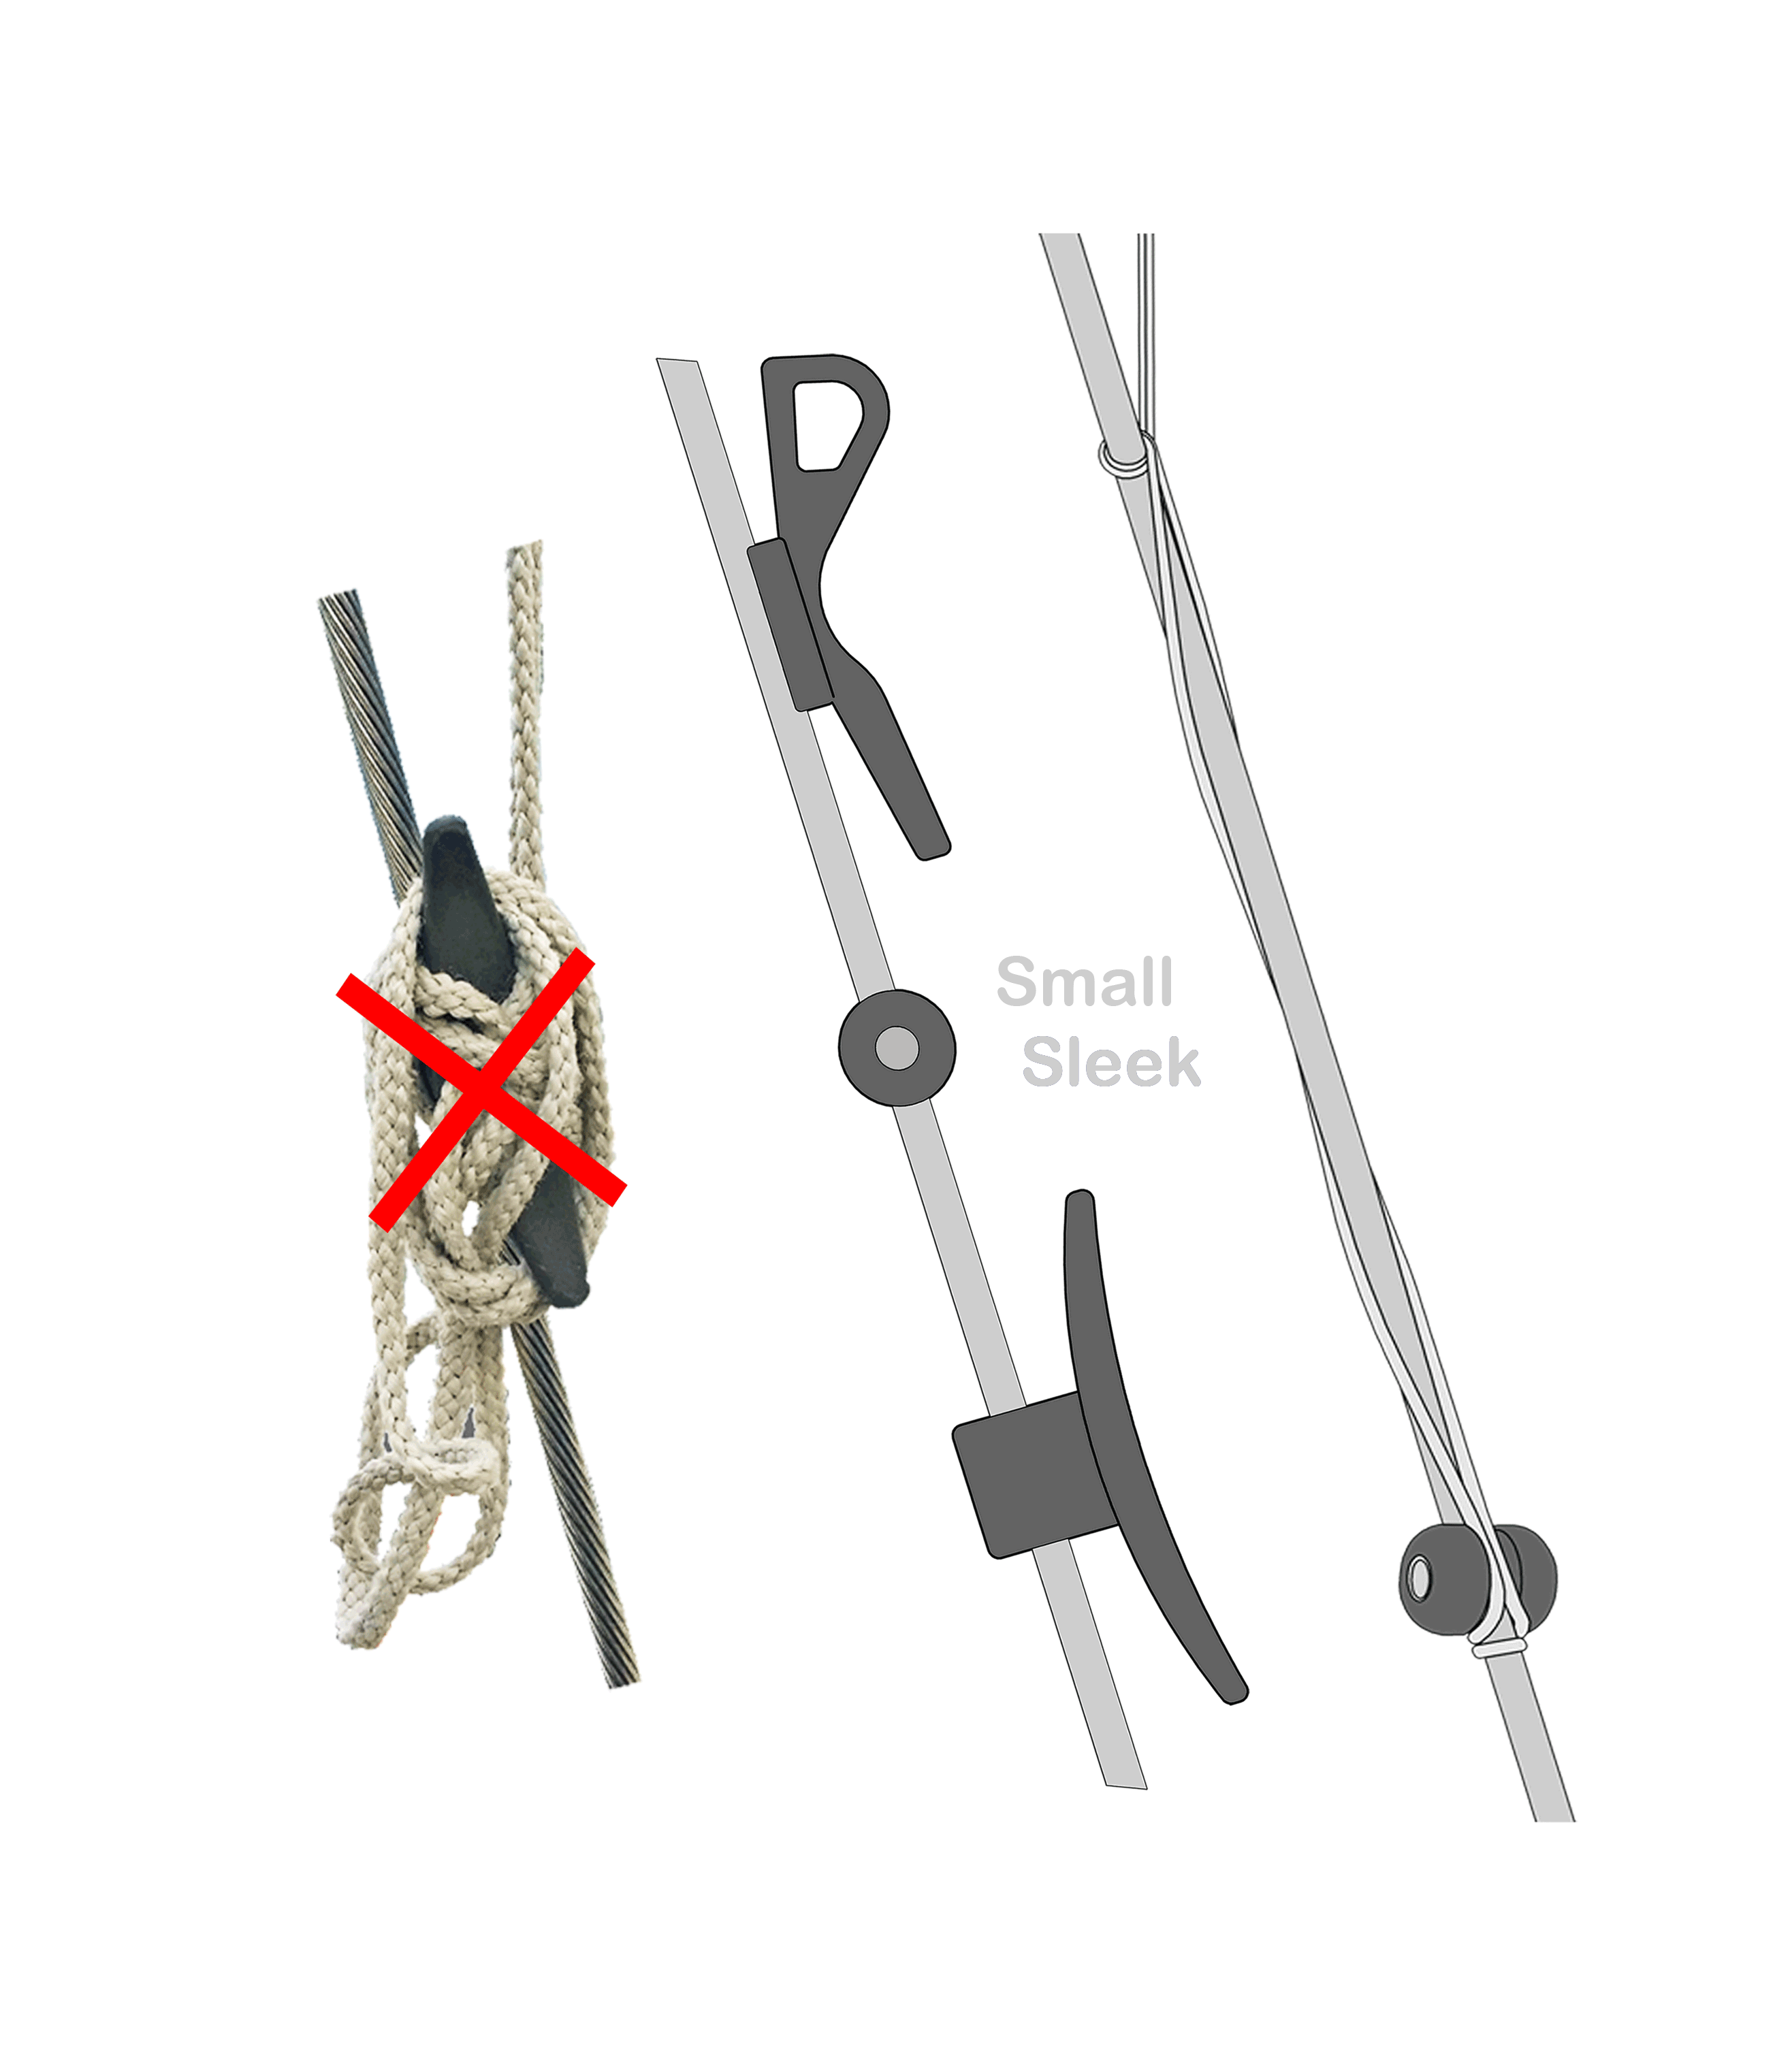
* No more messy fluttering spreader flag halyards.
* No chafing damage to sails.
* Amazingly simple.
The neat spreader flag halyard fastening.
| Four versions: |
Fsn-D8
Fsn-D7
Fsn-D6
for 8 mm. (5/16") shrouds
for 7 mm. shrouds
for 6 mm. (1/4") shrouds
International patents pending
Rally & Regatta EU division
The Netherlands
rallyandregatta@gmail.com